




































A finger over the lens, a horse in the dining room, and a home photographed while it’s literally on fire. Those bad real estate photos give buyers plenty to look at, although very little of it helps sell the house. They’re funny to scroll through until you remember that someone approved each one for a listing.
As a real estate agent, I know photo day sometimes involves moving pet beds, clearing counters, and having delicate conversations about a seller’s favorite decor. Those details matter because listing photos help buyers decide whether a home deserves an in-person visit. Here are 20 bad real estate listing photos that show what can go wrong, along with practical ways to get the shot right.
20 bad real estate listing photos
1. We see you
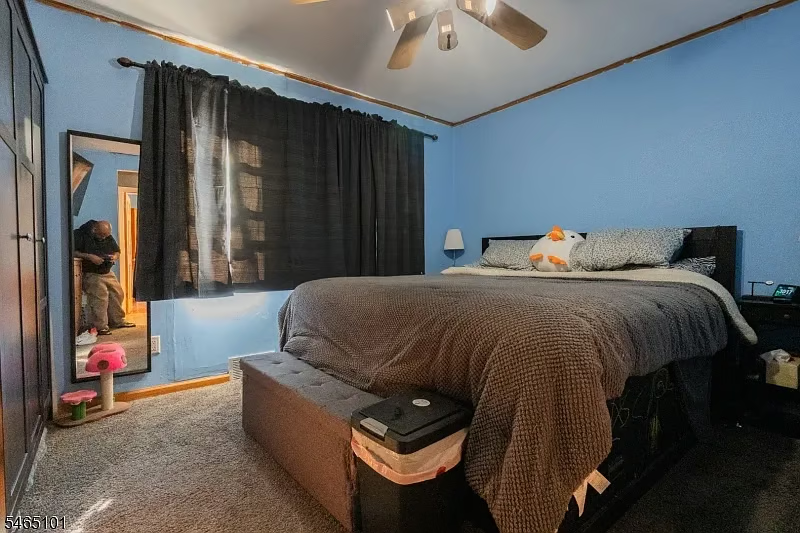
Why it’s bad: The mirror gives us a bonus feature nobody asked for: the photographer. Buyers should focus on the bedroom, not wonder who’s standing in the doorway.
Get the shot right: Use a tripod with a timer so you can step out of the reflection, or shoot from a different angle. Check mirrors before snapping the photo to keep the focus on the room and keep the photographer or agent out of the picture.
2. Showing by a-hiss-tment only
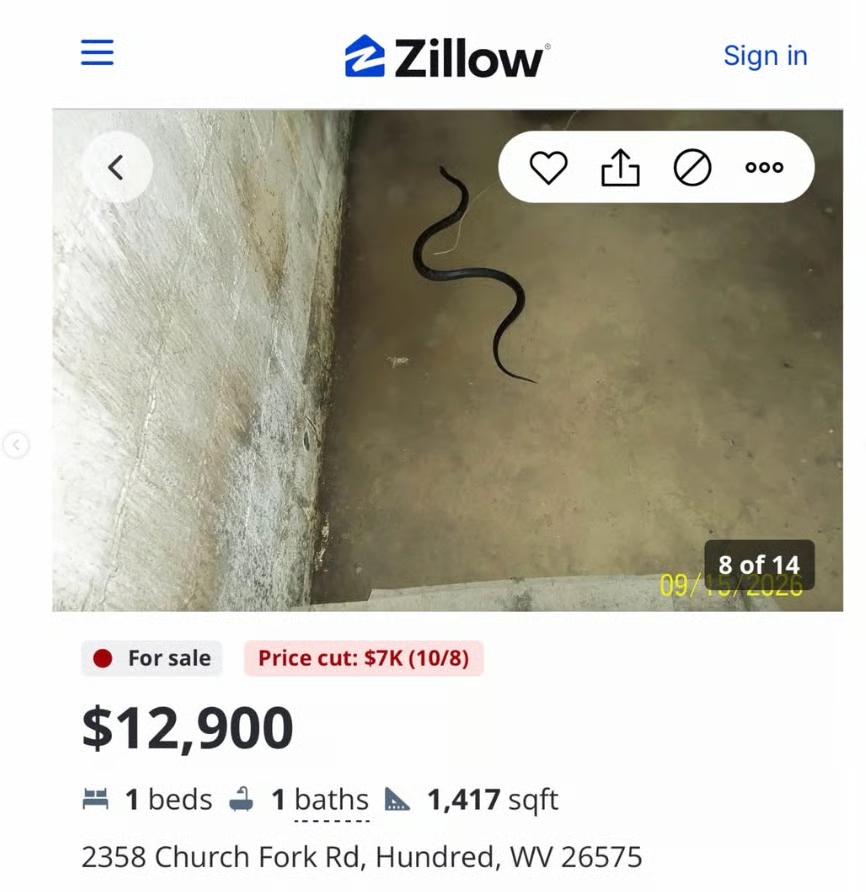
Why it’s bad: Buyers came to see the house, and now they’re checking every corner for its residents. A close-up of a snake probably isn’t the feature photo that will get them through the door.
Get the shot right: There’s no need for a snake photo shoot. Address any infestation and make appropriate disclosures to buyers and their agents. Make sure the area is safely cleared before photographing the space so buyers can see the property, not slithery residents.
3. Got milk? Apparently, so does the listing
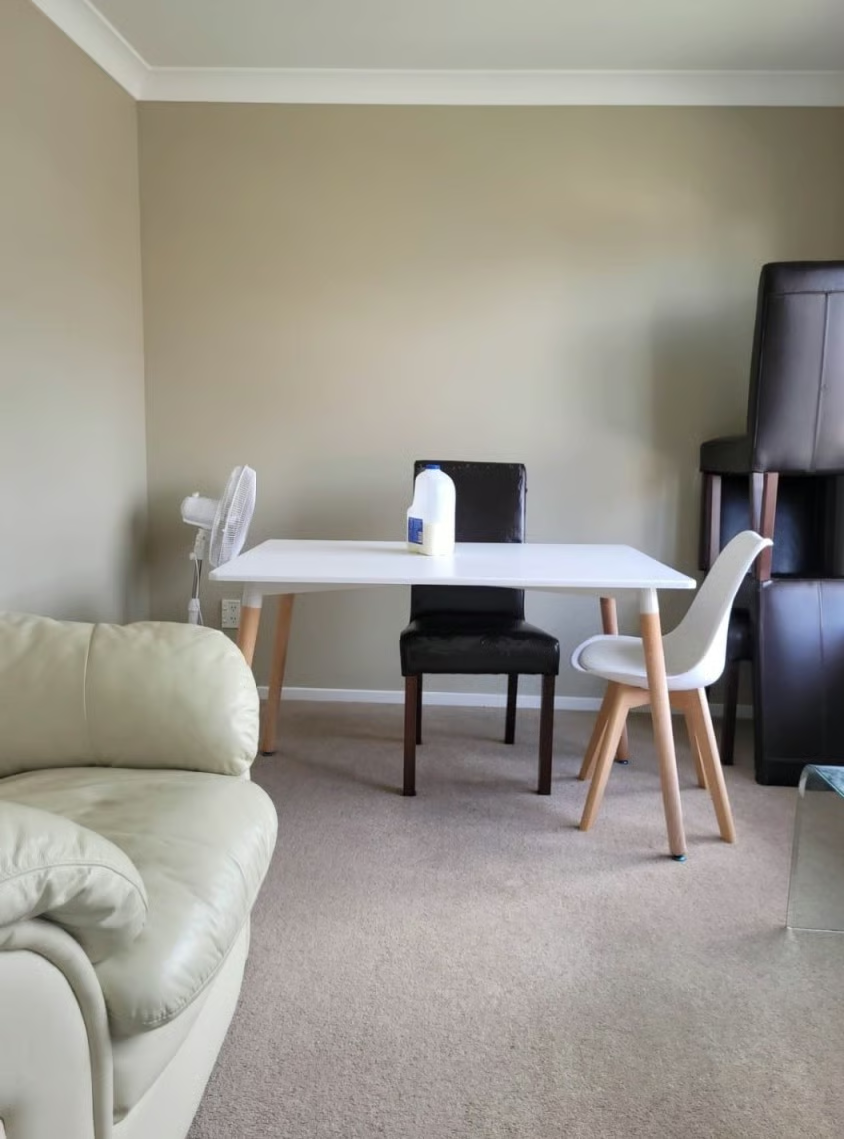
Why it’s bad: Nothing says “ready for picture day” like a lonely jug of milk on the table. Buyers should picture breakfast here, not wonder how long the milk has been out.
Get the shot right: Clear and wipe down countertops, tables, and other surfaces before photos. For my listings, I had clients declutter ahead of time, then moved any remaining items behind the camera during the photo shoot. And of course milk always belongs in the fridge.
4. Virtually staged, structurally confused
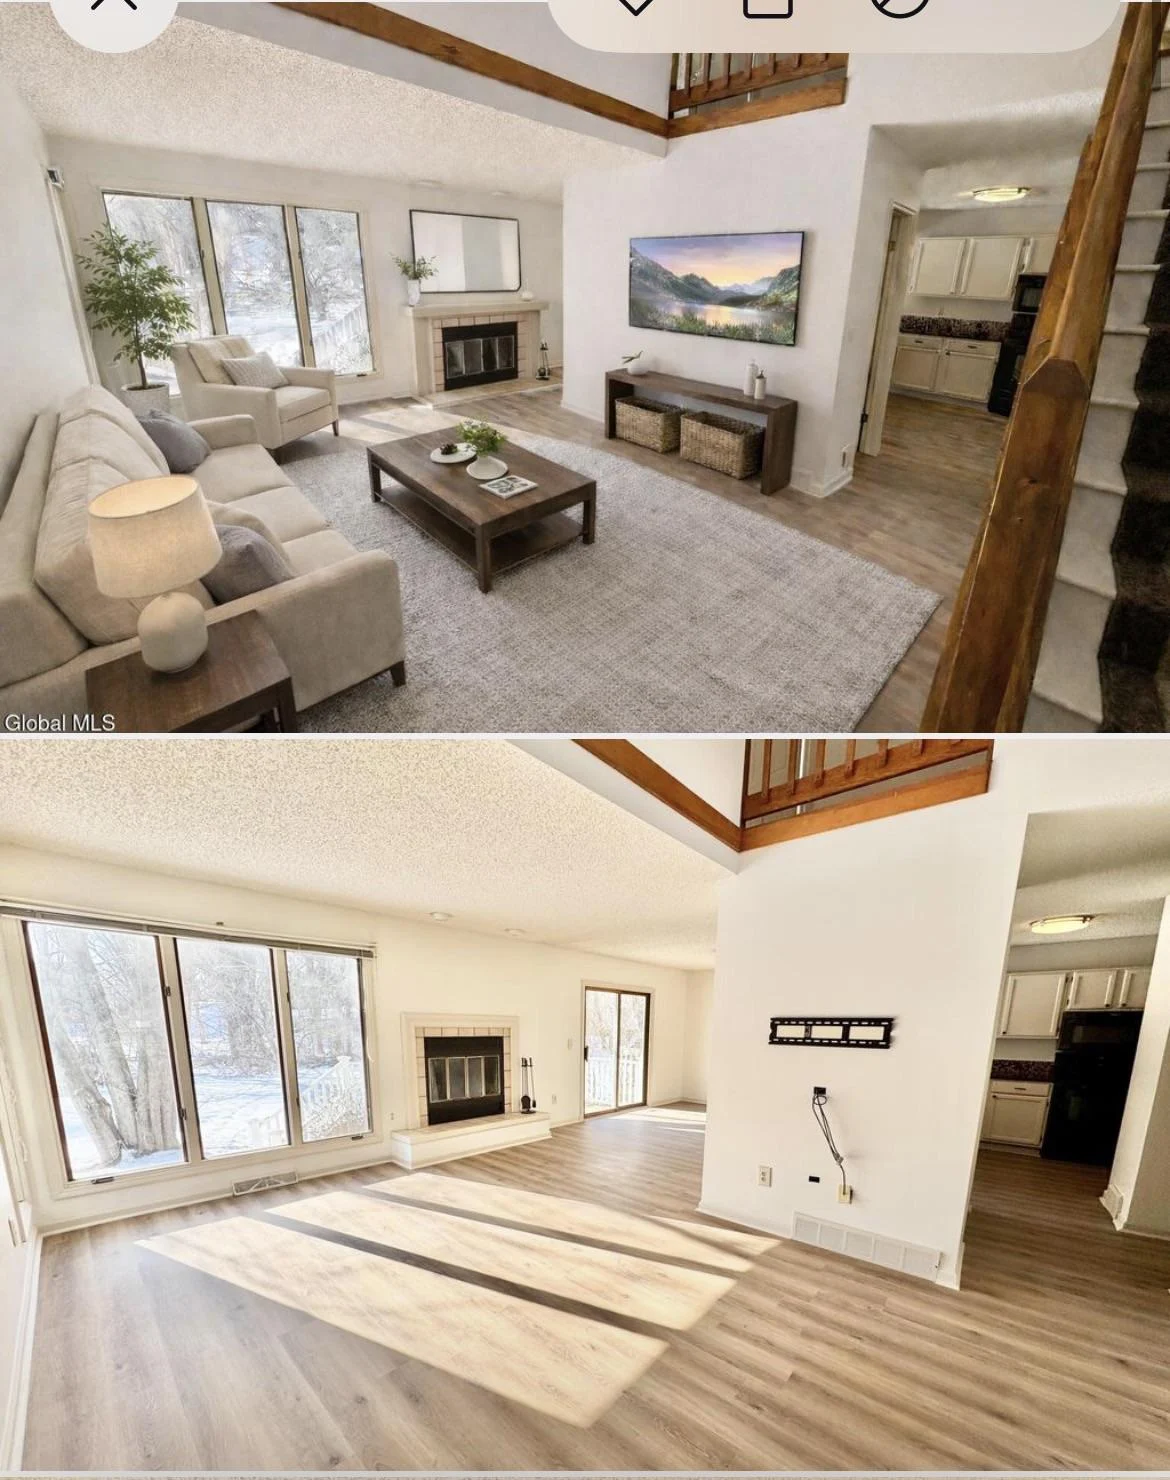
Why it’s bad: Apparently, the furniture came with a renovation. This virtual staging stretches a wall and adds stairs, turning decorating into a construction project nobody actually completed.
Get the shot right: Use virtual staging to help buyers imagine furniture and decor in the space. Keep walls, stairs, windows, and other permanent features true to the original photo. Compare the finished image against the original before publishing, clearly label it “virtually staged,” and include the unstaged photos so buyers can see the actual room.
5. Please don’t disturb
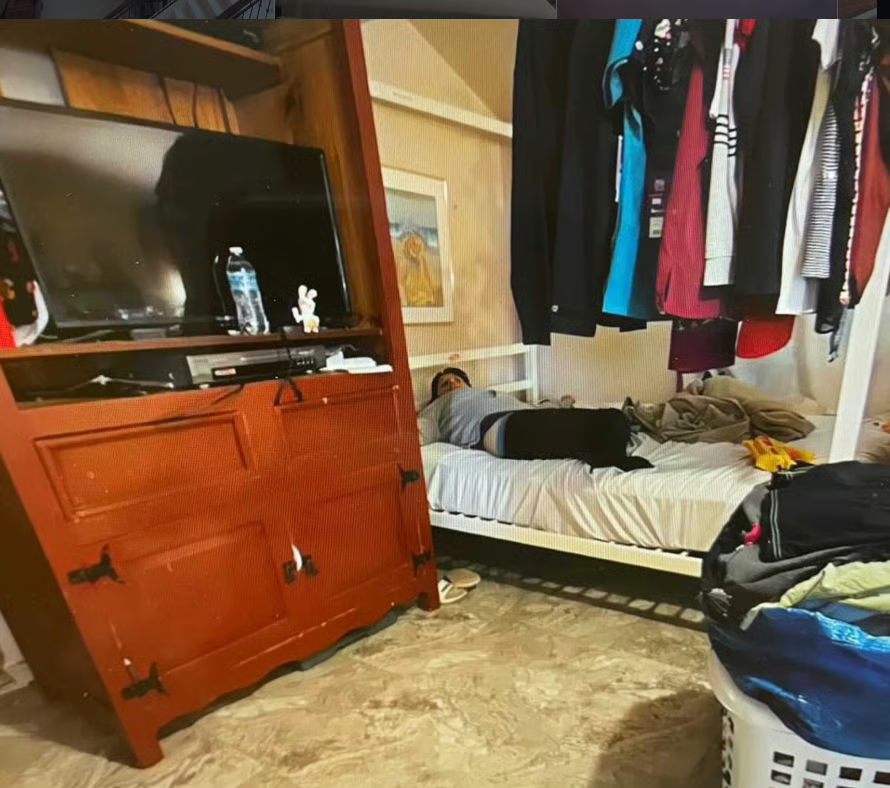
Why it’s bad: We want to see the bedroom without interrupting someone’s nap. A person sleeping in the bed distracts from the room and makes an already awkward photo feel like an invasion of privacy.
Get the shot right: Coordinate photos for a time when occupants can be out. If tenants are home, politely ask whether they’re comfortable stepping into another room. If they decline, respect that decision. Choose an angle that leaves them out, reschedule, or skip the room’s photo and describe it accurately in the listing. Any of those options beats publishing someone’s nap.
6. Forecast: Indoor showers
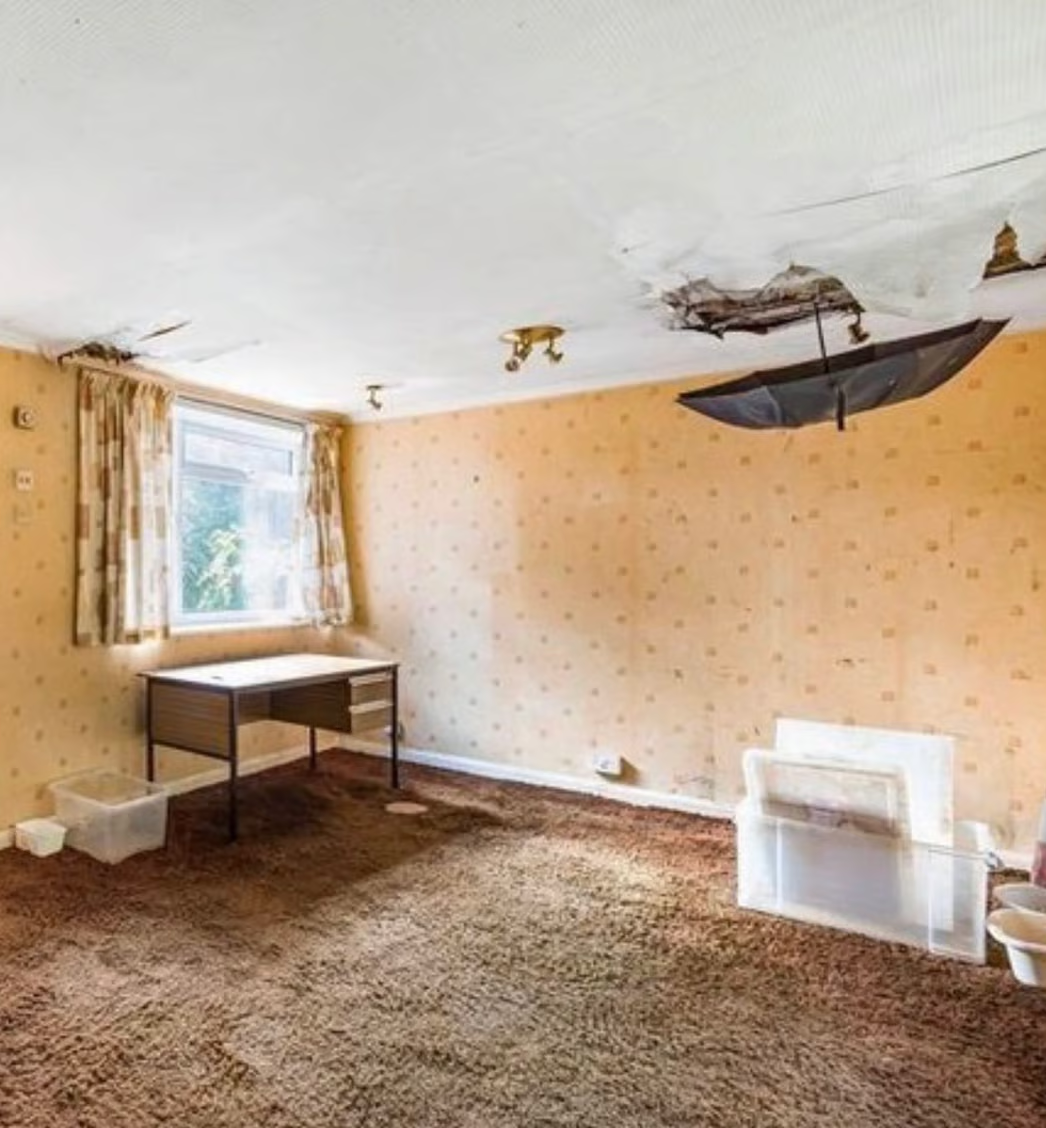
Why it’s bad: An umbrella hanging beneath a damaged ceiling raises more questions than it answers. Buyers should assess the room’s condition, not wonder whether they need rain gear for the showing.
Get the shot right: If it’s safe, remove the umbrella before photographing the room. Show the ceiling damage accurately and explain known issues through the appropriate disclosures. Removing a distracting object is fine; hiding the problem it’s catching is not.
7. Unfortunate stain
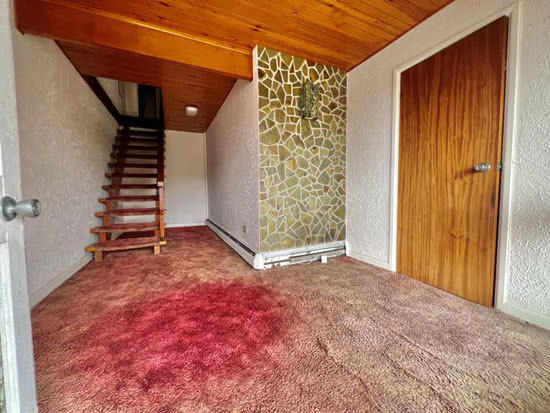
Why it’s bad: That red stain has buyers reaching out to a detective instead of a realtor. No matter what caused it, the stain steals attention from the rest of the room.
Get the shot right: Ask whether the seller is willing to have the carpet professionally cleaned or replaced before photos. If it’s only a cosmetic stain, a rug can help stage the space, but be upfront about the carpet’s condition.
8. Mane entry
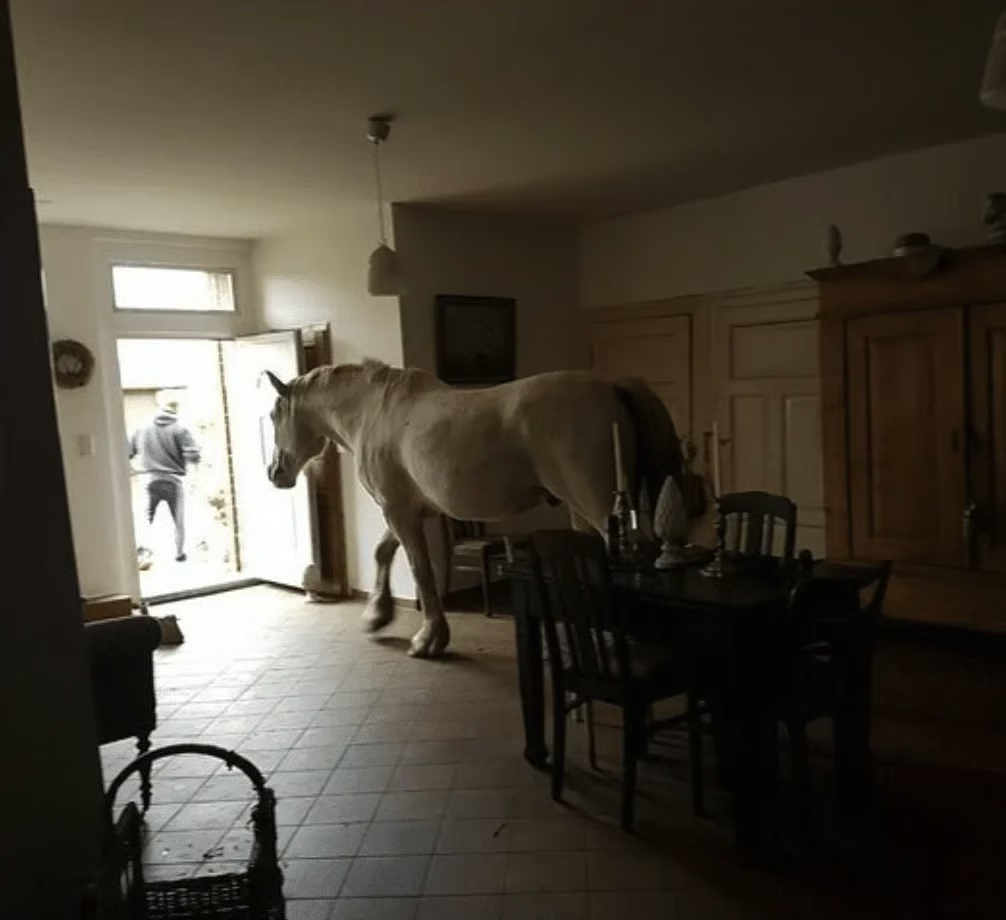
Why it’s bad: We’ve heard of an eat-in kitchen, but a stable-in dining room is new. The horse steals the show, leaving buyers wondering what else might trot through during a showing.
Get the shot right: Start by getting the horse safely outside. For my listings, I always moved pet beds, cat trees, litter boxes, and other pet items out of the shot. Some buyers aren’t animal lovers (I don’t get it either), so keep those items minimal during showings and temporarily move them behind the camera for photos. Buyers should notice the home before they notice occupants with paws — or hooves.
9. An indoor pool, technically
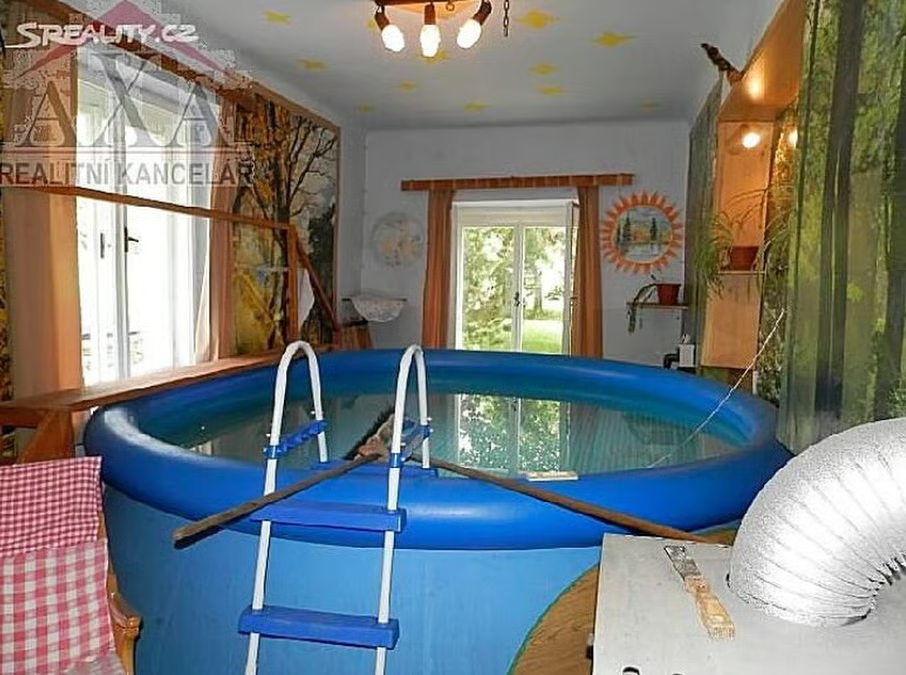
Why it’s bad: Someone took “bring the outdoors in” a little too literally. The pool fills nearly the entire room, making it difficult to judge the space, see the flooring, or imagine where furniture would go.
Get the shot right: This calls for more than fluffing a few pillows. Have the seller safely drain and remove the pool before photos, then check the flooring underneath. Stage the room for its intended use with appropriately sized furniture so buyers can understand the layout and see how they could use the space.
10. The hottest listing in town
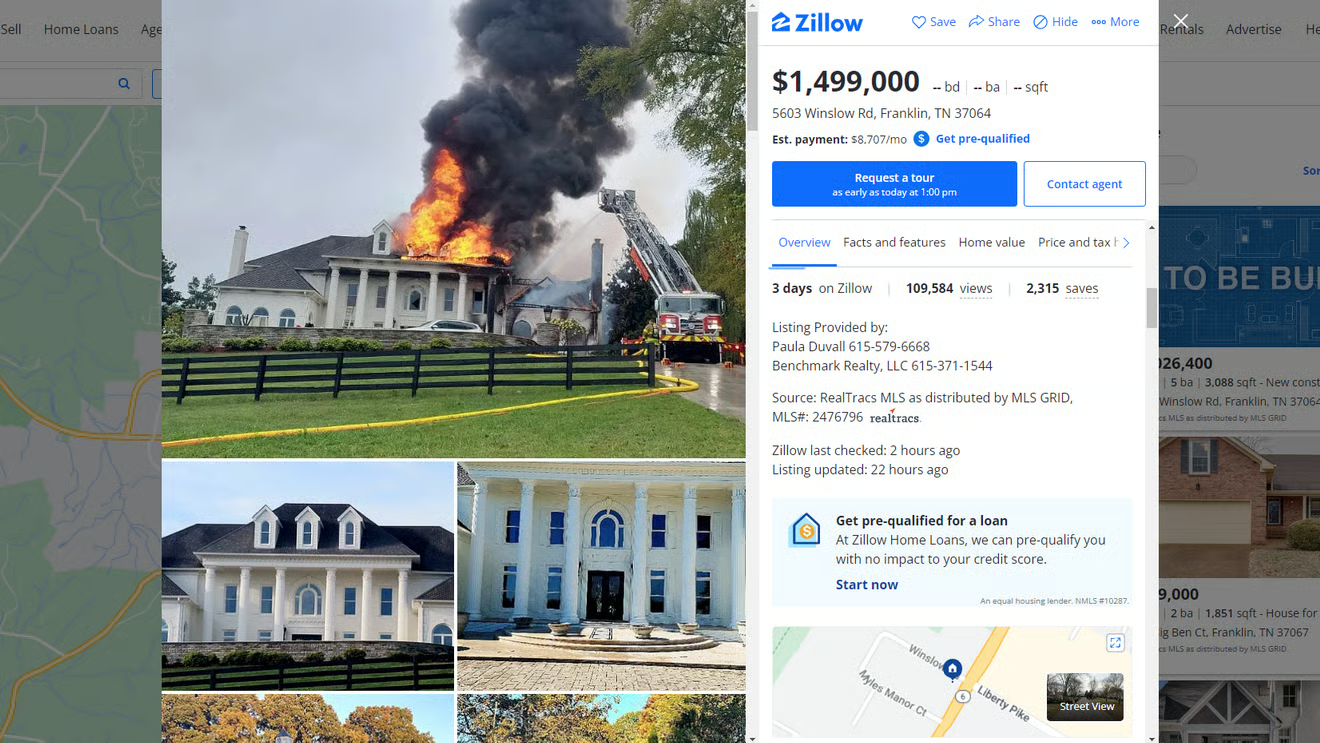
Why it’s bad: There’s generating interest, and then there’s generating smoke. A photo of the home engulfed in flames leaves buyers wondering whether to call their agent or the fire department.
Get the shot right: Show the property in its current condition once it’s safe to photograph. Clearly labeled photos from before the fire can help buyers understand what it looked like before and imagine its potential. Be upfront about the fire history and damage, but leave the emergency response out of the listing gallery.
11. Wall art that calls the shots
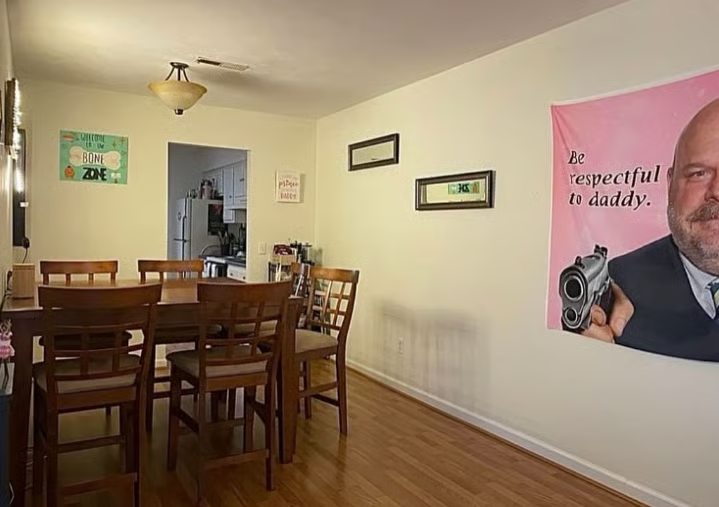
Why it’s bad: Nothing says “make yourself at home” like a tapestry pointing a gun at dinner guests. Buyers are likely to remember the wall tapestry long after they’ve forgotten the dining room.
Get the shot right: Ask the seller to temporarily remove the tapestry for photos. If they’d rather leave it up, try another angle that keeps it outside the frame while still showing the room’s size and layout. A little camera repositioning can keep personal decor from becoming the listing’s main attraction.
12. This listing gets a thumbs-down
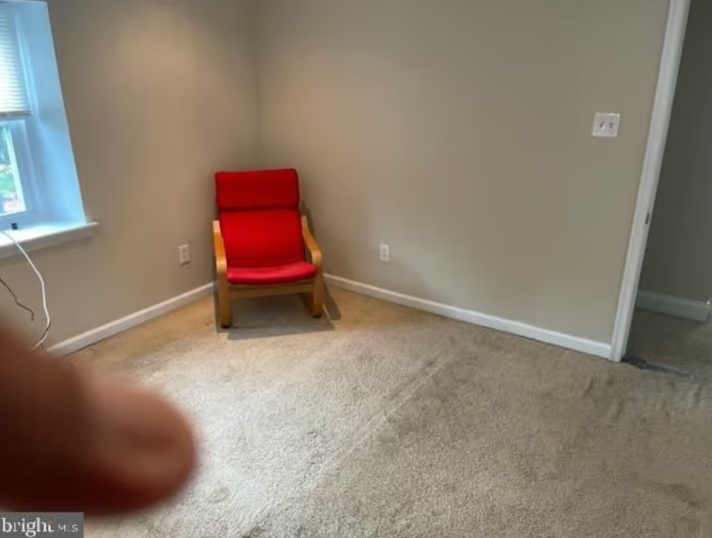
Why it’s bad: The room comes with neutral walls, a red chair, and a complimentary finger. Covering part of the lens makes the photo look careless and blocks the space buyers are trying to see.
Get the shot right: Keep your fingers out of the frame, and review every image before uploading it. Better yet, hire a professional real estate photographer. This is a good reminder that taking the photos yourself can save money upfront, but it can also leave your listing looking less polished than it deserves.
13. Room in motion
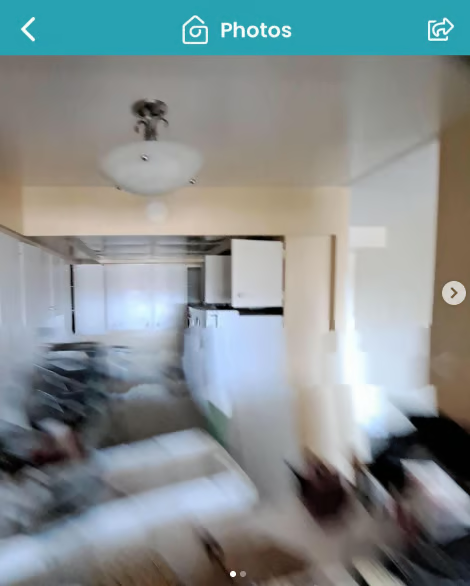
Why it’s bad: This looks like the photographer took it while fleeing the room. Buyers can barely make out a room, and the blur makes it difficult to assess its features or condition.
Get the shot right: Use a tripod or hold the camera steady before taking each photo. Review your shots and zoom in to check sharpness before leaving the property so you can retake anything blurry. You don’t want to discover at your desk that one of your only photos is completely unusable.
14. No clowning around
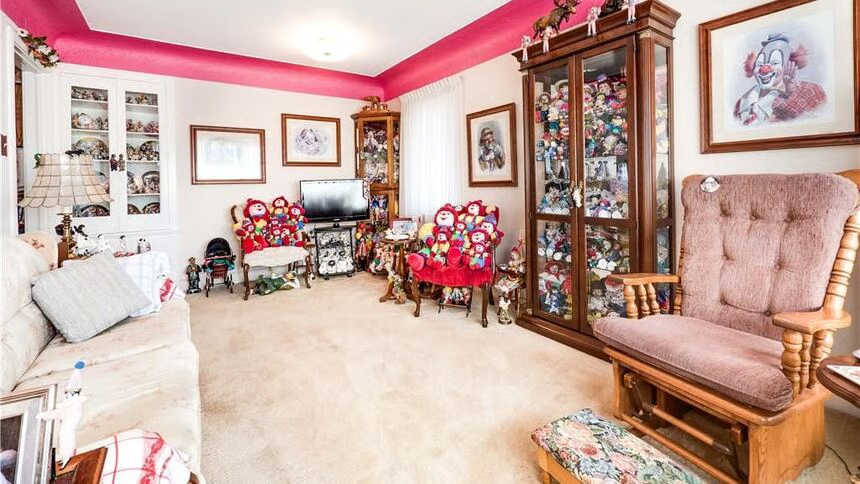
Why it’s bad: This room comes with an audience, and they’re all clowns. For buyers who find them frightening, the collection could be enough to skip a showing. Even clown enthusiasts may struggle to look past the decor and notice the room itself.
Get the shot right: My rule for staging listings has always been less is more. With the seller’s permission, pack away most of the collection and display only a few small pieces. You can respect the seller’s taste while giving buyers room to imagine their own belongings in the space.
15. Storage space for your nightmares
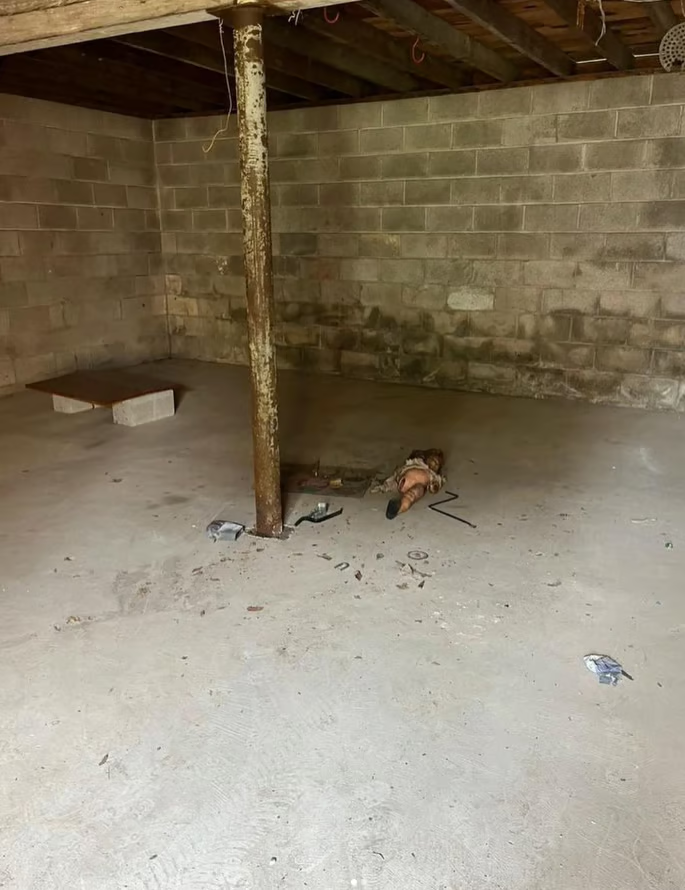
Why it’s bad: An unfinished basement is one thing. An unfinished basement with a discarded doll is the opening scene of a horror movie. Scattered items make the space look neglected and leave buyers with something unsettling to remember.
Get the shot right: Clear the floor before taking photos, starting with the doll. I personally skip photos of unfinished basements and garages unless they offer something worth highlighting. Every room doesn’t need a spot in the gallery. Describe the space accurately in the listing and let the photos focus on the home’s strongest features.
16. Street view, questionable timing
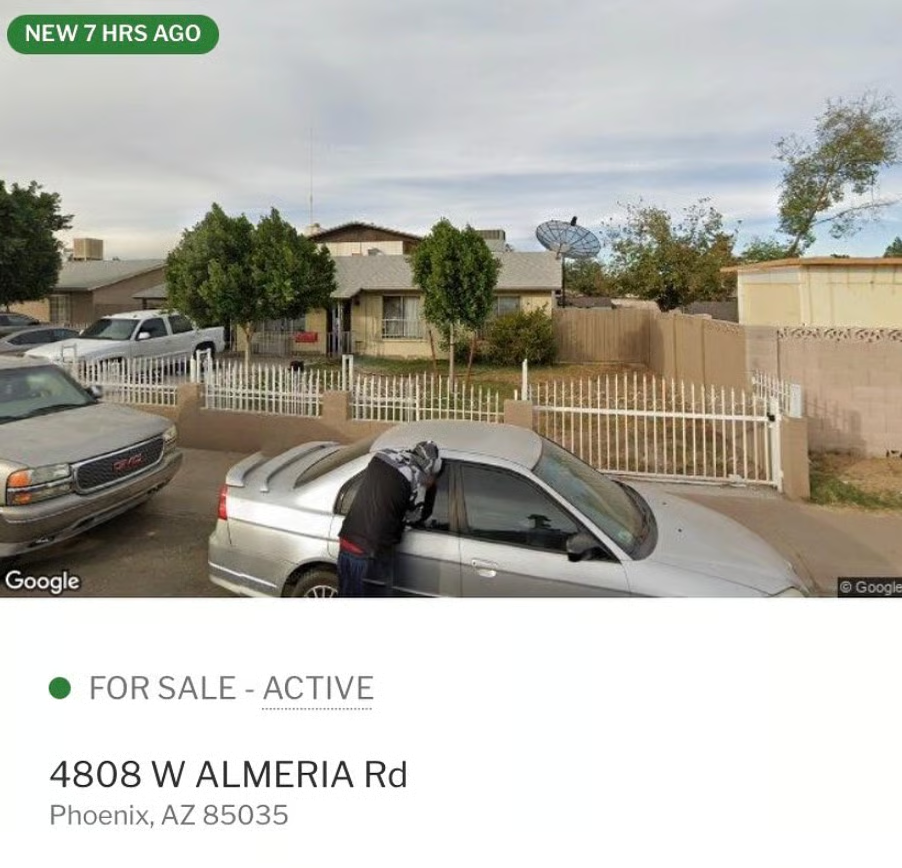
Why it’s bad: Buyers came to check out the house, but now they’re trying to figure out what’s happening at the car window. We don’t know what the person is doing, but the awkward moment distracts from the property and could leave buyers with the wrong impression.
Get the shot right: Check which street-view image appears on your listing, especially if you haven’t supplied an exterior photo. Automated images can capture moments you wouldn’t choose for your marketing. Provide a clear, current exterior photo, then review the published listing to see what buyers actually see.
17. Square footage sold separately
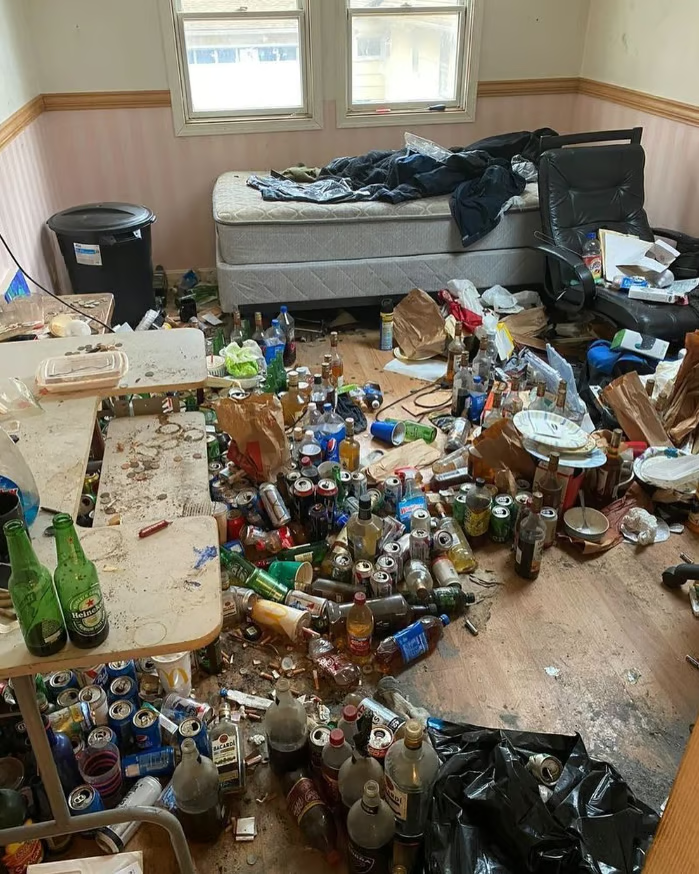
Why it’s bad: There’s a floor in here somewhere, but buyers shouldn’t have to organize a search party to find it. Bottles, trash, and scattered belongings hide the room’s size and condition, making showings feel more like a cleanup assignment.
Get the shot right: I would make a full clear-out and thorough cleaning a priority with the seller before scheduling photography. Remove the trash, clear the floors and surfaces, and address any issues uncovered during cleanup. Give buyers a clear view of the space and a reason to see it in person.
18. Parked past its prime
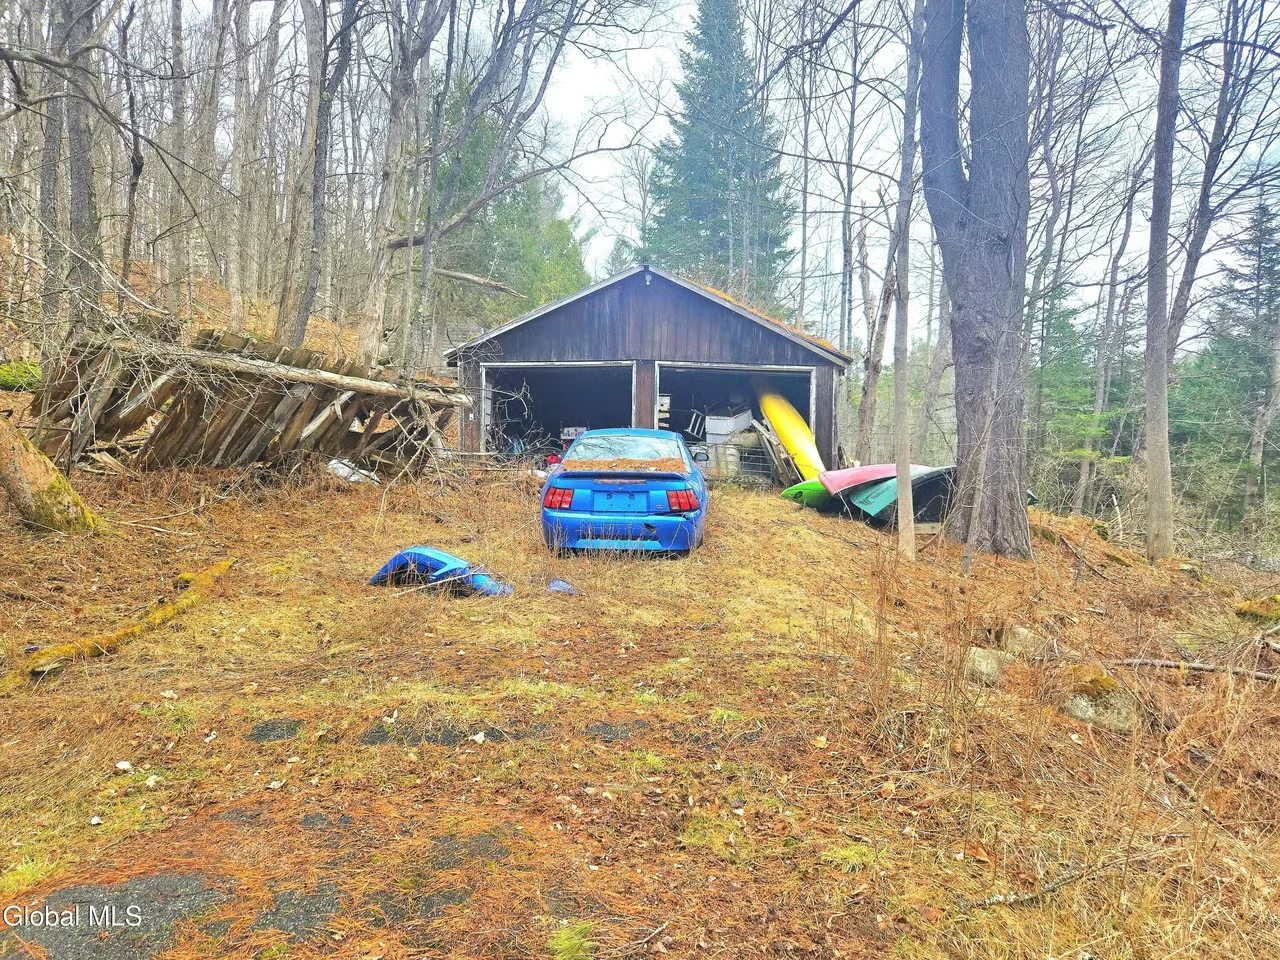
Why it’s bad: The car appears to have settled in for the long haul. Between the vehicle, scattered debris, and overflowing garage, buyers may see a cleanup project before they notice the property’s outdoor space.
Get the shot right: Ask the seller to remove the broken-down car and clear the debris before photography. I had a listing with a disabled car in the driveway, and my clients removed it after I recommended doing so. I also recommend removing items around the garage so buyers can see the space without mentally adding a tow truck to their moving expenses.
19. Breaking news, distracting listing
'
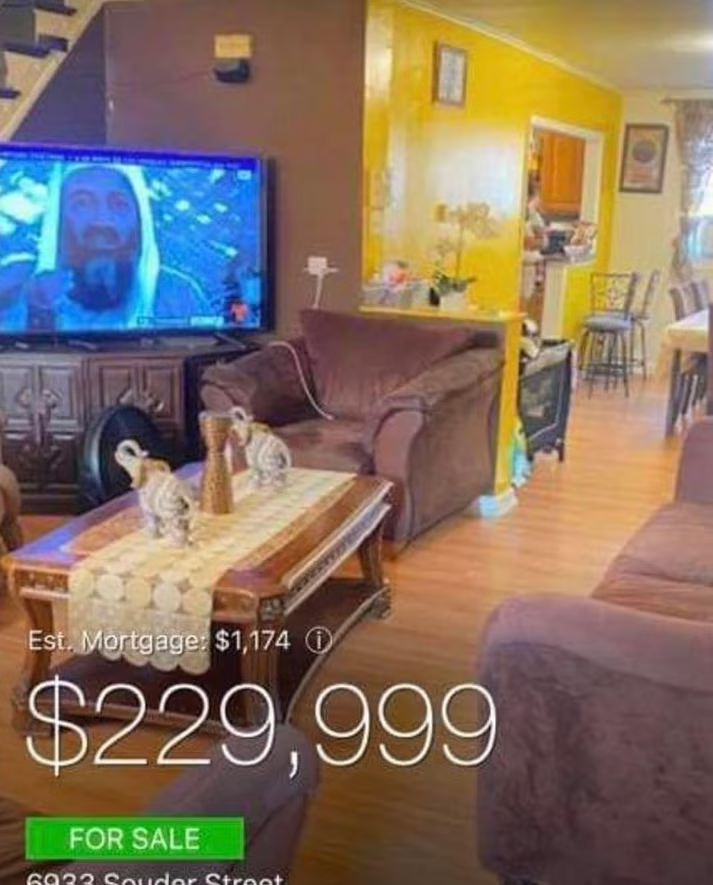
Why it’s bad: The television has turned this living room listing photo into an unwanted news broadcast. Buyers should focus on the layout, but the image of Osama bin Laden will likely grab their attention first.
Get the shot right: I prefer televisions switched off for listing photos. If you want the screen on, choose a neutral nature still and check what’s displayed before taking the shot. A peaceful landscape can complement the room without making buyers wonder what they’ve tuned into.
20. A kitchen demo nobody ordered
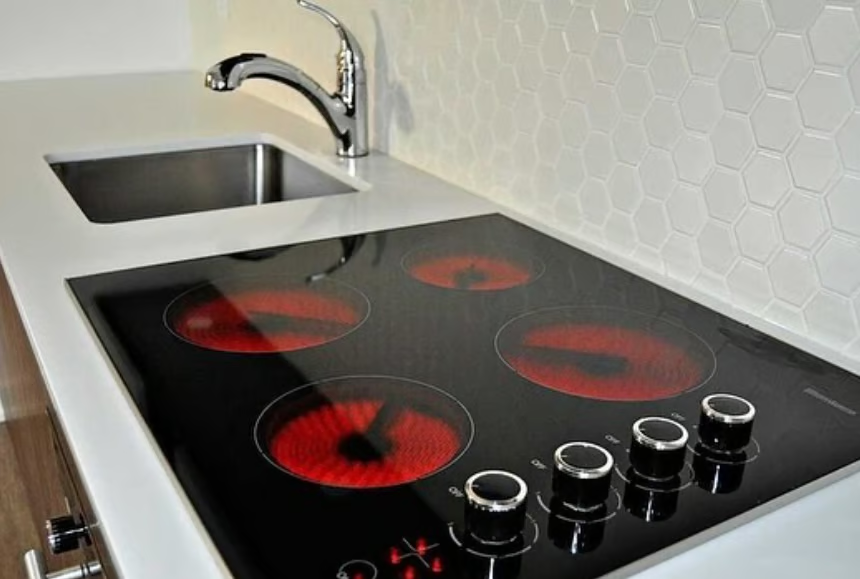
Why it’s bad: All four burners are on for no reason. Showing an appliance switched on adds little useful information and may leave buyers wondering why you’re demonstrating some features and not others.
Get the shot right: Turn off the cooktop and faucets, then step back to capture the kitchen’s layout, counters, cabinets, and appliances together. Save demonstrations for showings or inspections. Listing photos should help buyers understand the space, without making them feel like they’re watching an appliance sales pitch.
Related articles
- 7 Interior Design Trends Ready to Take Over
- Hosting a Virtual Open House: The Ultimate Guide
- 5 Best Real Estate Video Editing Software
- Real Estate Digital Marketing: A Complete Guide With Strategies & Tips
How to get the most from your real estate photos (and never end up on this list!)
You don’t need a perfectly renovated home to create a useful listing gallery. You need preparation, clear photos, and a little judgment about what belongs in the frame. Here’s what I recommend before your next photo appointment:
- Hire a professional real estate photographer: Review their portfolio for clear details, balanced lighting, and natural-looking rooms. Discuss the shots you need, especially features that deserve extra attention.
- Give sellers a preparation checklist: Ask them to clear counters, put away laundry, remove trash, and tidy outdoor areas before the photographer arrives. Specific instructions are easier to follow than “get the house ready.”
- Do a walkthrough before shooting starts: I like to check for the small things sellers may overlook, including pet bowls, cleaning supplies, personal paperwork, and whatever is playing on the television. Move remaining distractions out of the frame.
- Plan around people and pets: Coordinate a time when occupants can step out or move between rooms. Give pets a comfortable place away from the photography so they don’t become the listing’s surprise feature.
- Help buyers understand the layout: Choose angles that show how the space works. A close-up of a faucet or stovetop rarely tells buyers as much as a clear view of the whole kitchen.
- Keep staging realistic: Use furniture and decor to show how a room could function. If you use virtual staging, preserve the actual structure, clearly label the images, and include original photos for comparison.
- Check images before the photographer leaves: Confirm they captured important spaces and flag any obvious distractions. If you’re taking photos yourself, zoom in to check focus rather than relying on the small camera preview.
- Choose the gallery carefully: Lead with a strong image and arrange the rest in an order that helps buyers follow the property. Remove blurry shots and unnecessary duplicates.
- Review the published listing: Check photo order, cropping, orientation, and any automatically supplied images. What looked right in your upload may appear differently on a listing website.
Frequently asked questions (FAQs)
What makes a real estate photo bad?
A bad real estate photo makes the property harder to understand or appreciate. Blur, poor lighting, distracting belongings, awkward angles, and visible people can all pull attention away from the space. A technically sharp photo can still miss the mark if it focuses on something that doesn’t help buyers evaluate the home.
Should real estate agents take their own listing photos?
I recommend hiring a professional real estate photographer whenever possible. Preparing a listing already gives agents plenty to manage, and a photographer brings experience with lighting, composition, and editing. If you take the photos yourself, set aside enough time and review every image before publishing.
Should every room appear in listing photos?
Every room doesn’t necessarily need its own photo. Focus on images that help buyers understand the layout, condition, and useful features. An ordinary unfinished storage area may need only an accurate description, while a finished basement or organized workshop could deserve several photos.
Bringing it all together
Bad real estate photos can give us a good laugh, but they also show how easily a distraction can take over a listing.
My approach is to prepare the home with the seller, give the photographer room to work, and review the finished gallery with a buyer’s questions in mind. Can they understand the layout? Can they see the features worth visiting for? A little care before publishing helps the property make a good first impression.
And if there’s a horse in the dining room, photo day can wait.
You may also like…
- 20 Weird Real Estate Listings in 2026 You Won’t Believe
- 68 Hilarious Real Estate Memes Realtors Can’t Stop Sharing
- 27 Funny Real Estate Videos You Need Right Now
- The Complete Guide for Effective Listing Presentations (+Template)