


First impressions mean everything when you’re listing a home. The pictures you use will be your first chance to make your potential buyers stop scrolling through Zillow and pick up the phone to call you. Knowing how to photograph real estate makes all the difference by using high-quality photos. Pictures can make a property shine, catching the eye and sparking interest immediately.
Get ready to dive into some fun and practical tips for real estate photography that are sure to make your listing photos truly stunning and stand out from the crowd!
Tip 1: Schedule Your Shoot for Optimal Lighting
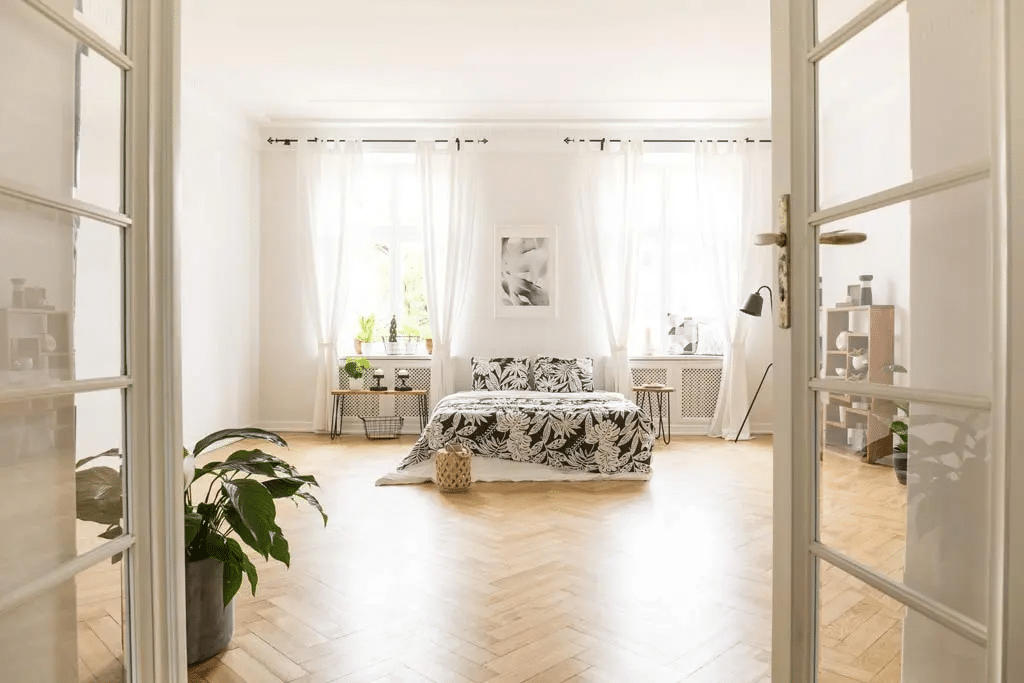
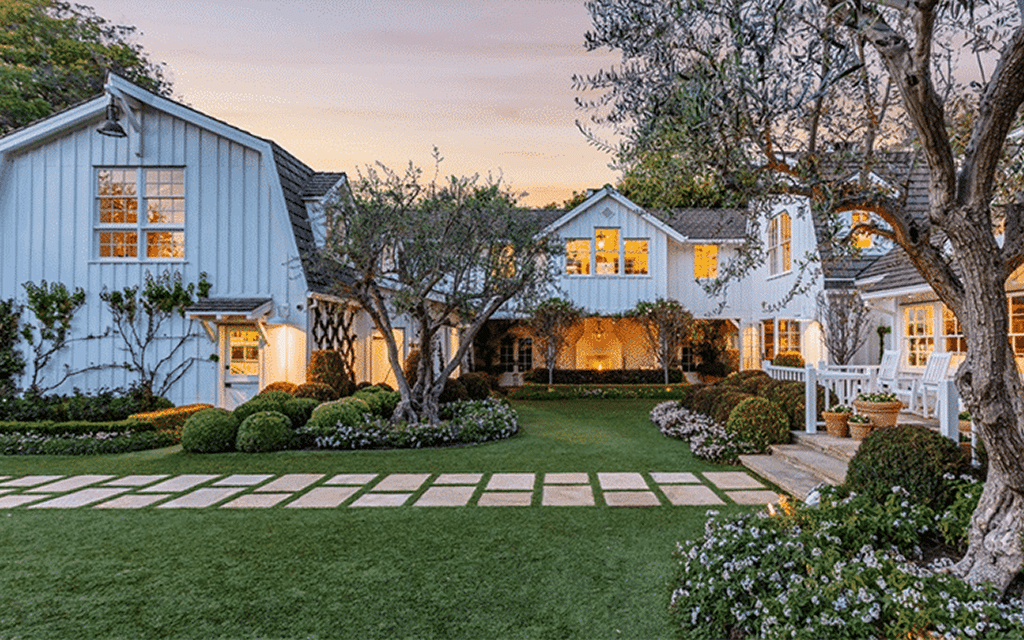
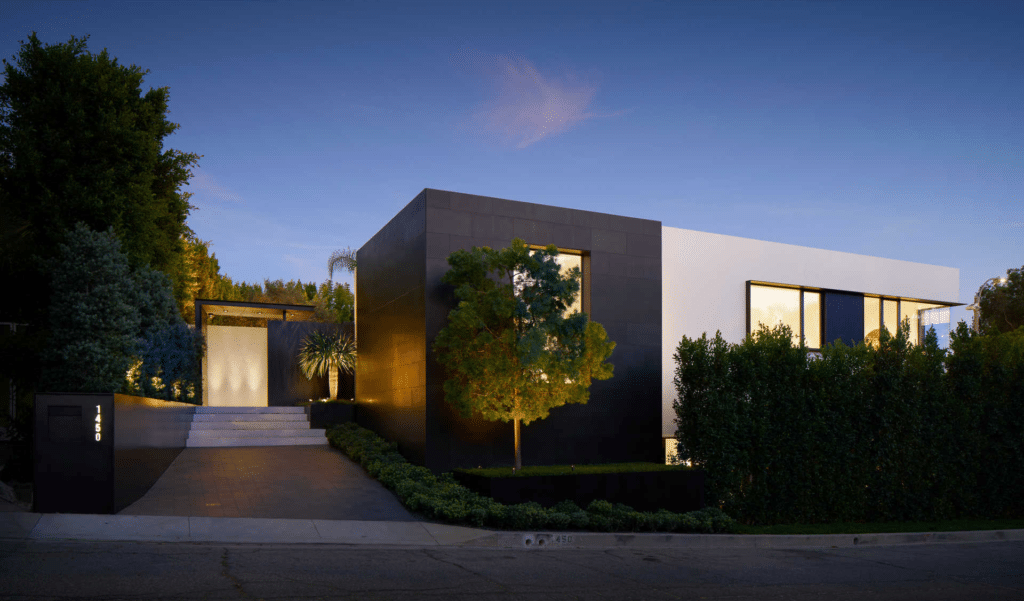
Believe it or not, scheduling your photoshoot for the right time of day can make a huge difference in the quality of your photos. The golden hours of early morning or dusk are perfect for dramatic hero shots of the home’s exterior. Many photo editors fake dusk shots; why not capture them for real? For taking real estate photos of the interior of the home, aim to shoot during the golden hours, early morning or late afternoon, when the light is soft and flattering. The natural light will surely add warmth to any room—as long as there is a window!
Try not to schedule your shoot for midday when the sun is harsh, as it can cast strong shadows and wash out important details. You will want to capture rooms when they’re filled with light, so pay close attention to the sun’s direction. Keep in mind the weather as well. Clear, sunny days typically produce the best results. By carefully choosing the right timing, you can ensure your listing photos are bright and welcoming and truly showcase the property’s charm and curb appeal.
If you’re having trouble finding the right light and need finishing touches put on your pictures, consider hiring a freelance photo editor on Fiverr. Remember, the goal is to put a professional touch on the final product to enhance a photo, not to cover blemishes. That’s a big no-no.
Tip 2: Clean, Depersonalize & Declutter
After your shoot is scheduled, it’s time to put your best foot forward and work with your homeowner to depersonalize and declutter the listing. Homeowners can be very emotional over removing their personal items, so make sure you sell the reasoning—the new owner has to be able to imagine that they live there. Also, make sure to tell them that a neutral home with only a few decorative elements is the key to great listing pictures.
Here’s a quick checklist you can use to take the sting out of asking them to clean windows and put away toys so that you can take pictures.
General
Kitchen
Bathrooms
| Bedrooms
Dining Room
Front & Backyard
Finished Garages or Basements
|
You can copy and paste the checklist above if you want to edit it, or just download our spiffier version as a PDF below and add your personal branding using Acrobat Pro.
Tip 3: Set the Scene with Effective Staging
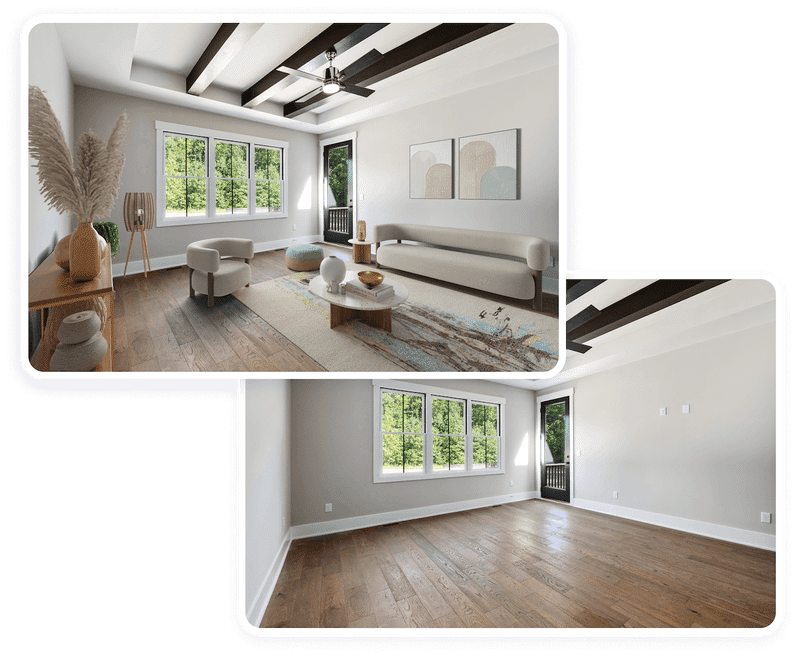
Now that your listing is clean and decluttered, you have a fresh canvas to showcase the property’s best features. Even if a home is already furnished, things will need to be changed to make it look better on camera. If the home is empty and you have the budget, consider hiring a professional to stage it.
If you want to know how to take real estate photography to the next level or simply on a lower budget, consider virtual staging or creating a virtual tour. Just remember to label your virtually staged images before uploading them to your MLS to avoid violating your MLS guidelines. Check out Apply Design for an easy, affordable way to stage your listing virtually. It only takes 15 minutes to get realistic results. The pictures are stunning, but if you don’t like what you see, they will do revisions for you in no time. Try it today for free!

You can learn more tips about staging a home here: 17 Clever Home Staging Tips From Top Agents (+ DIY Shopping Guide)
Tip 4: Plan Your Photo Shoot Using a Shot List
It’s time to plan the order of the rooms and the details you will photograph. This is called a shot list. It might seem like overkill at first, but planning out your shoot will make it much easier to sort through your pictures when you get back to the office. In most cases, you’ll want to shoot in the same order your pictures will be on your MLS.
The only caveat here is that you won’t be able to capture a trendy dusk picture of the front of the house if you show up before the golden hour. This is why we recommend shooting the home’s exterior twice: once when you first arrive and once at the end of your shoot.
Here’s an example of a shot list:
Exterior of the Home: Full Sunlight
The front of the home: One head-on and one from each angle
The backyard: One shot of the view of the yard from the home, one shot of the view of the home from the yard, detail shots of the yard
Interior of the Home
Capture three angles as well as details and vignettes of each of the following:
- Living room
- Kitchen
- Primary bedroom
- Primary bathroom
- Guest bedrooms
- Guest bathrooms
- Home office
- Finished basement
Exterior of the Home: Dusk
The front of the home: One head-on, one each from right angle and left angle
Pro tip: Remember to turn on the interior lights when you shoot your dusk shot in front of the home for that warm, cozy glow!
Tip 5: Invest in the Right Photography Tools
To get the right shots for your listing, having the right equipment is key.
- A high-quality camera captures sharp, detailed images to showcase a property’s features and appeal to future buyers.
- Tripods provide stability for clear photos, especially in low-light conditions, ensuring your images look professional and polished.
- External flashes and lighting equipment enhance lighting in dim areas, especially those with little to no natural light.
Now, if you’re going to ask me which camera to use—I can’t make that decision for you—but I can give you some of the best recommendations we’ve found. Whether you’re looking for the best cell phone camera or the best handheld, here are some of my best recommendations.
That said, here are some basic recommendations for cameras that should work for most real estate photography applications.
| Best Phone Cameras |
|
| Best Budget DSLR Camera |
|
| Best High-end DSLR Camera |
|
| Best Budget Mirrorless Camera |
|
| Best High-end Mirrorless Camera |
|
Tip 6: Master the Art of Photography Techniques
The reason you take listing photos is to draw in potential buyers to purchase the home. There are many techniques that can breathe life into dull spaces. Nine times out of ten, it’s not the tool, it’s the person using it. The main techniques a photographer needs to use are as follows:
- Rule of thirds for balanced shots
- Wide-angle lenses to capture more of the room
- Angles and perspectives that make spaces look larger
Take the rule of thirds, for example. There is a formula that professional photographers use to compose their pictures that was discovered in 300 BCE. Don’t believe me? Take a look at the photograph below.
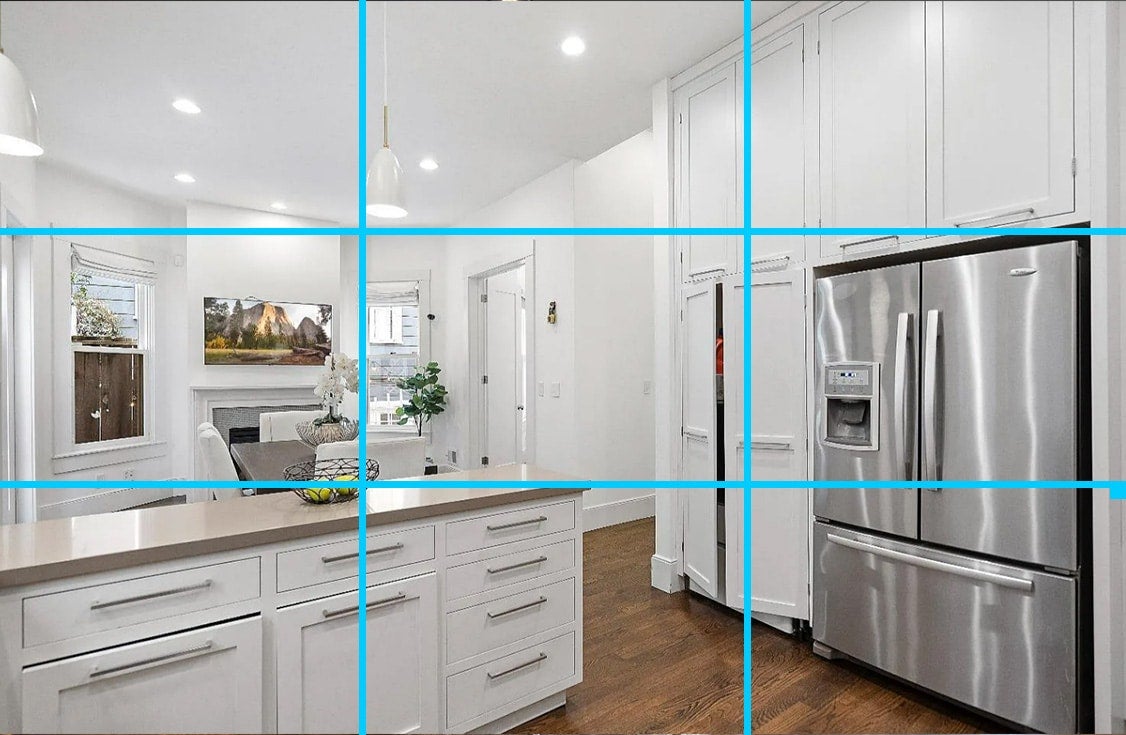
Notice how the bowl of fruit on the countertop, the light fixture, and the open cabinet doors all line up at the intersections of the blue grid? Notice how the picture is broken up vertically into three sections that roughly match the three horizontal sections of the grid? That’s no accident. It’s a composition technique that most professional photographers use to take pictures for real estate that just look right, known as the rule of thirds.
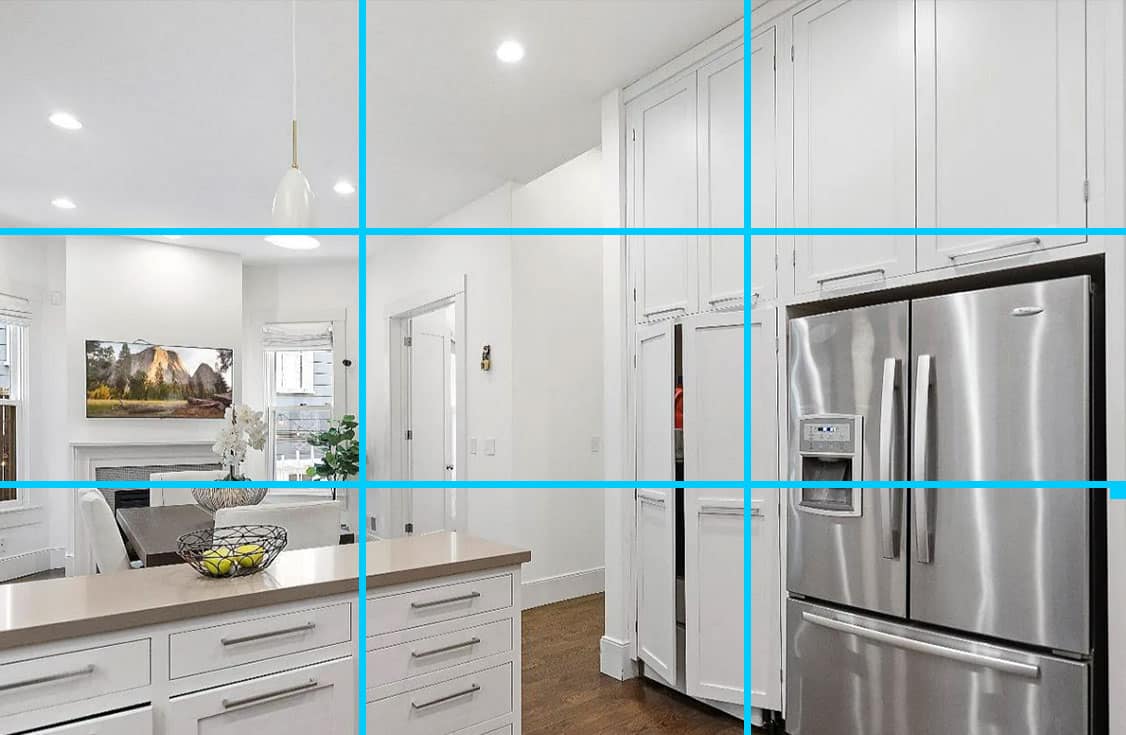
Now let’s look at the same picture composed without using the rule of thirds. All the same elements are there, but it just looks … off.
Tip 7: Use Photo Editing Software
Editing software helps you polish your photos and make them look their best. There are several options out there, most of which will allow you to adjust lighting, correct colors, and remove any elements that take away from a professional finish. Some graphic design and editing software, such as Adobe Lightroom, cost a bit more yet have extensive features that also come with a steep learning curve. More inexpensive editing software, such as Canva, tends to be easier to use and requires no tech skills to pick it up.
Be sure to do your research and choose the tools that can add just the right flair to your listing photos. Here are a few editing software types to consider adding to your toolkit.
- HDR software: This is great for combining multiple exposures, capturing a full range of light and detail.
- Virtual tour software: Create virtual tours, offering potential buyers an interactive experience.
- Mobile editing apps: This is handy for quick edits on the go and perfect for enhancing photos directly from your smartphone.
- Drones and videography software: Get stunning aerial shots, giving a unique perspective on properties and their surroundings.
If you’re new to photo editing, check out Canva. It’s beginner-friendly, has free and paid features, and can be used for more than just editing. Use your listing photos to create branded marketing content that’s sure to get that listing sold!
Tip 8: Decide Whether to Hire or Do-it-Yourself (DIY)
I recommend hiring a professional photographer whenever your budget allows. Hiring a pro lets you skip the learning curve and get consistent results for every listing. While your mistakes might not be immediately noticeable to you at first, when your seller compares your DIY photos to the professional pictures in other listings on Zillow, yours will almost always fall short. It’s a few hundred dollars well spent, in my opinion.
If you think you’ve got what it takes and know how to take real estate photos, just be sure your results can measure up so you don’t end up with bad real estate photos. You know you’ve been on MLS making fun of agents and asking yourself, “What were they thinking!” Don’t end up like them.
Before you make a decision, let’s take a look at the pros and cons of each method.
|
|
|
|
|
|
|
|
|
|
|
|
Frequently Asked Questions (FAQs)
The homeowner has an adorable dog. Should I include her in a few pictures?
No. Even if your homeowner client has an incredibly photogenic pet, avoid the temptation to take pictures with them in the shot. Sure, pet owners may love it, but what about all the other buyers who check out your listing? Some people see a cute dog or cat and immediately think of allergies and bad smells. That snuggly picture of your homeowner’s Dalmatian by the fire just might alienate a significant percentage of your buyers.
Is real estate photography easy?
Yes and no. It can take years to truly master the composition, framing, and interplay between light, aperture, and shutter speed that are required for truly stunning real estate photography. That said, anyone who puts in the time and effort to learn the basics can end up with pictures they would be proud to post on their MLS. Scheduling your shoot at the right time, always shooting with a tripod, and composing pictures using the rule of thirds are great first steps on the road to professional-quality real estate photography.
When should I order photos for a listing?
Right away. If you plan on using a professional photographer, you will want to coordinate with them as soon as possible. Scheduling conflicts happen, and you may end up not being able to use your favorite photographer if you wait. Many companies allow you to book an appointment online, while you may have to personally call individual photographers. Side note: If you use an admin or transaction coordinator, make sure they have a list of your preferred photographers.
Bringing It All Together
Learning how to take real estate photography is a blend of preparation, technique, and the right tools. Whether you hire a professional or take the DIY route, focusing on composition, lighting, and editing will make your listings shine bright like a diamond.
Have any killer DIY realty photography tips we missed? Let us know in the comments.